WINDOWS RECEIVER

Monitor your phone cameras on a Windows laptop

Connect up to four Solo Camera phones. Watch the feeds on your laptop or send a selected feed to OBS.

Download Solo Receiver for Windows

Extract the ZIP and run SoloCamera.Windows.exe. Keep the files together. The app needs the .NET 10 Desktop Runtime.

Windows Receiver

Monitor up to four phones

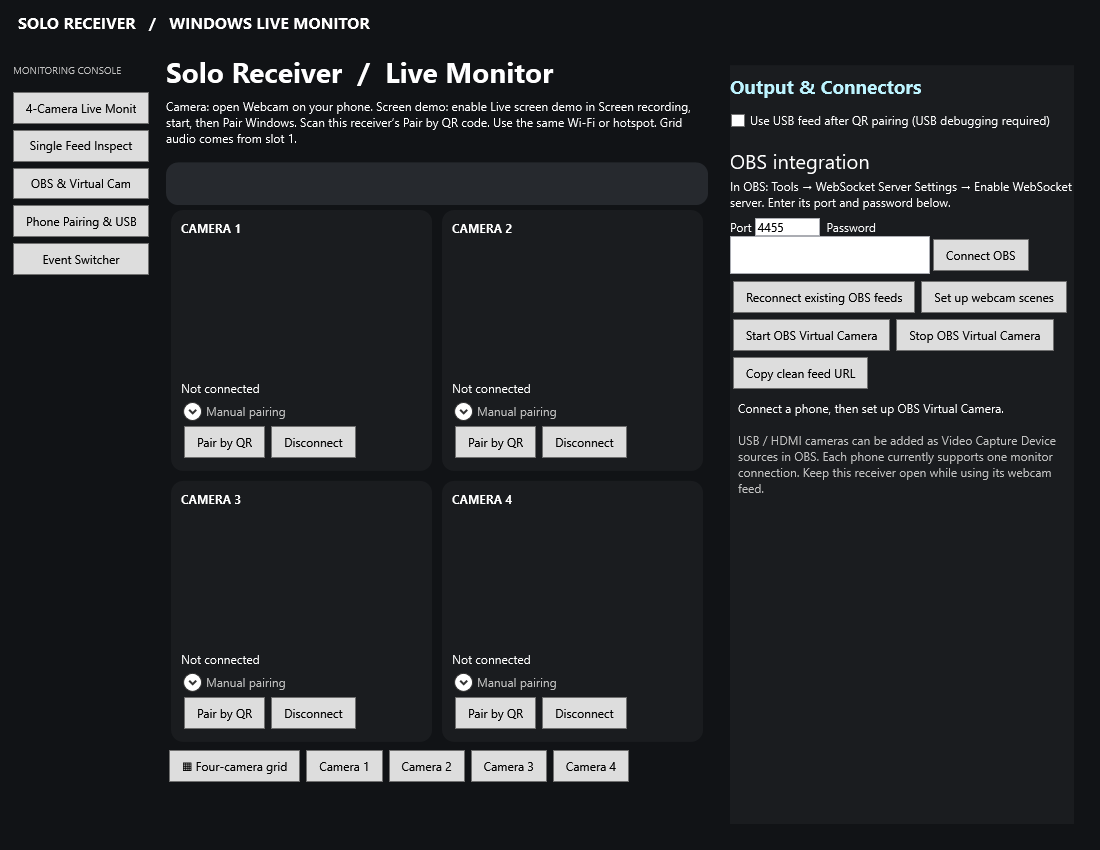
Open Solo Receiver on Windows and pair phones in individual slots. The preview grid works without OBS. Use Single Feed Inspect to examine a slot, or choose an output for the local clean feed. Event Switcher lets you stage a camera and use Take live to change the receiver output. Public streaming still runs through OBS.

  1. Monitor and inspect navigation
  2. Pair by QR in a camera slot
  3. OBS and USB controls
  4. Clean-feed output selector
Open full-size screenshot
Monitor up to four phones1234

Windows Receiver

Pair a phone by QR

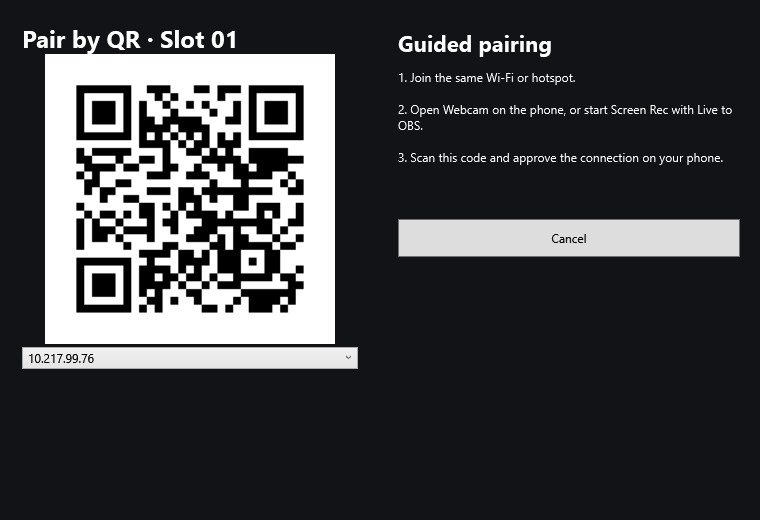
Put both devices on the same Wi-Fi or hotspot. Choose Pair by QR for a vacant slot. On the phone open Webcam, scan the receiver code, and approve the destination. For screen demos use Screen Rec with Live to OBS enabled. The QR pictured here is a sample.

  1. Receiver QR
  2. Guided steps
  3. Network address selector
Open full-size screenshot
Pair a phone by QR123

Windows Receiver

Open Webcam and PC Feed

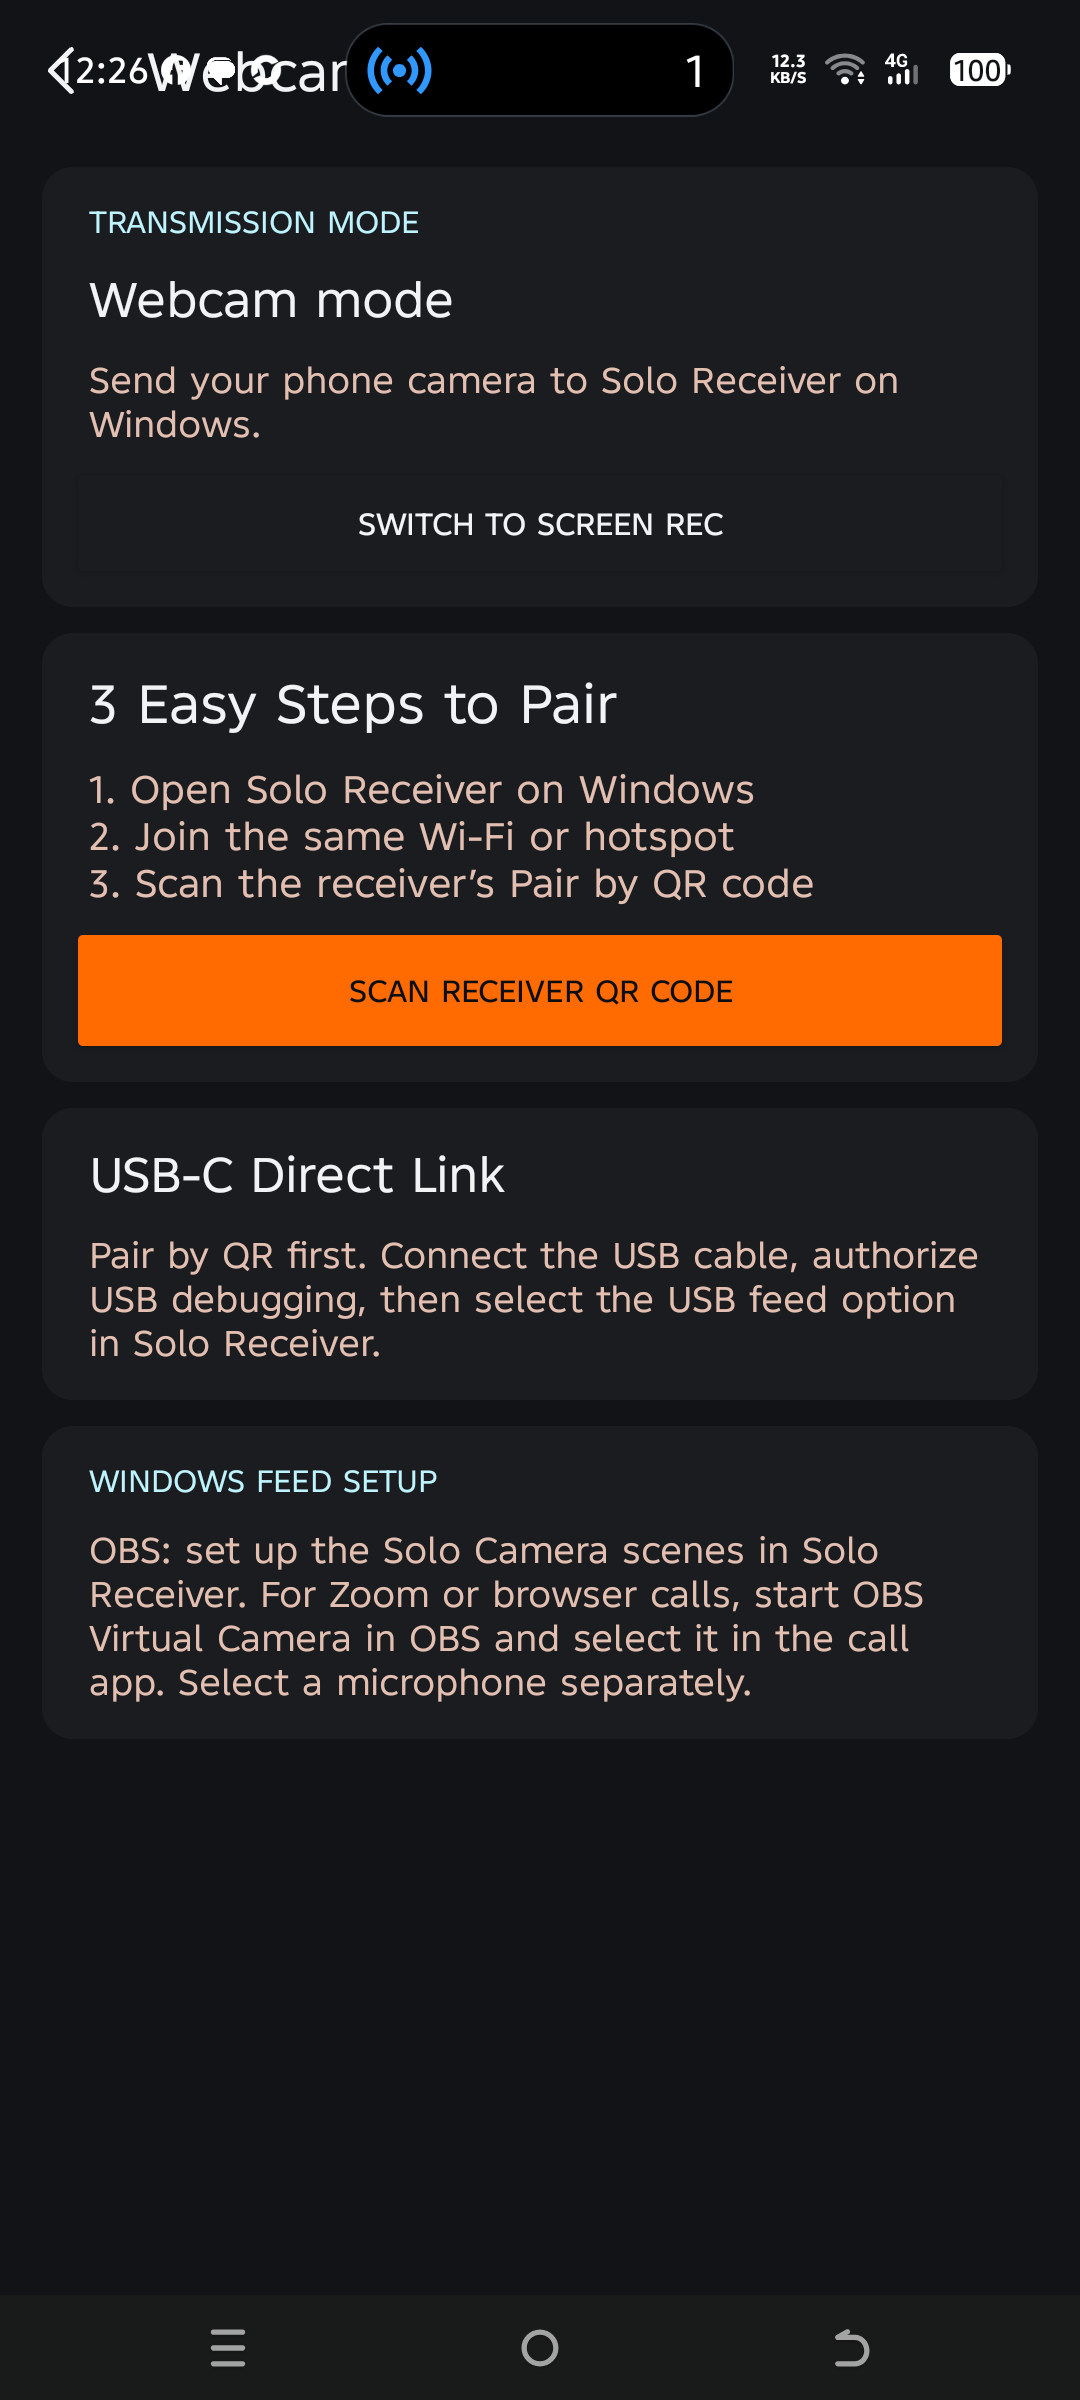
From Creator Studio tap Webcam. Use Scan receiver QR code, then approve the computer on the phone. After QR pairing, optional USB forwarding requires an unlocked phone, authorized USB debugging, and Android platform tools. For Zoom or a browser select OBS Virtual Camera and a separate microphone.

  1. Switch to Screen Rec
  2. Scan receiver QR code
  3. USB-C instructions
Open full-size screenshot
Open Webcam and PC Feed123

Screen recording

Configure Screen Recording Setup

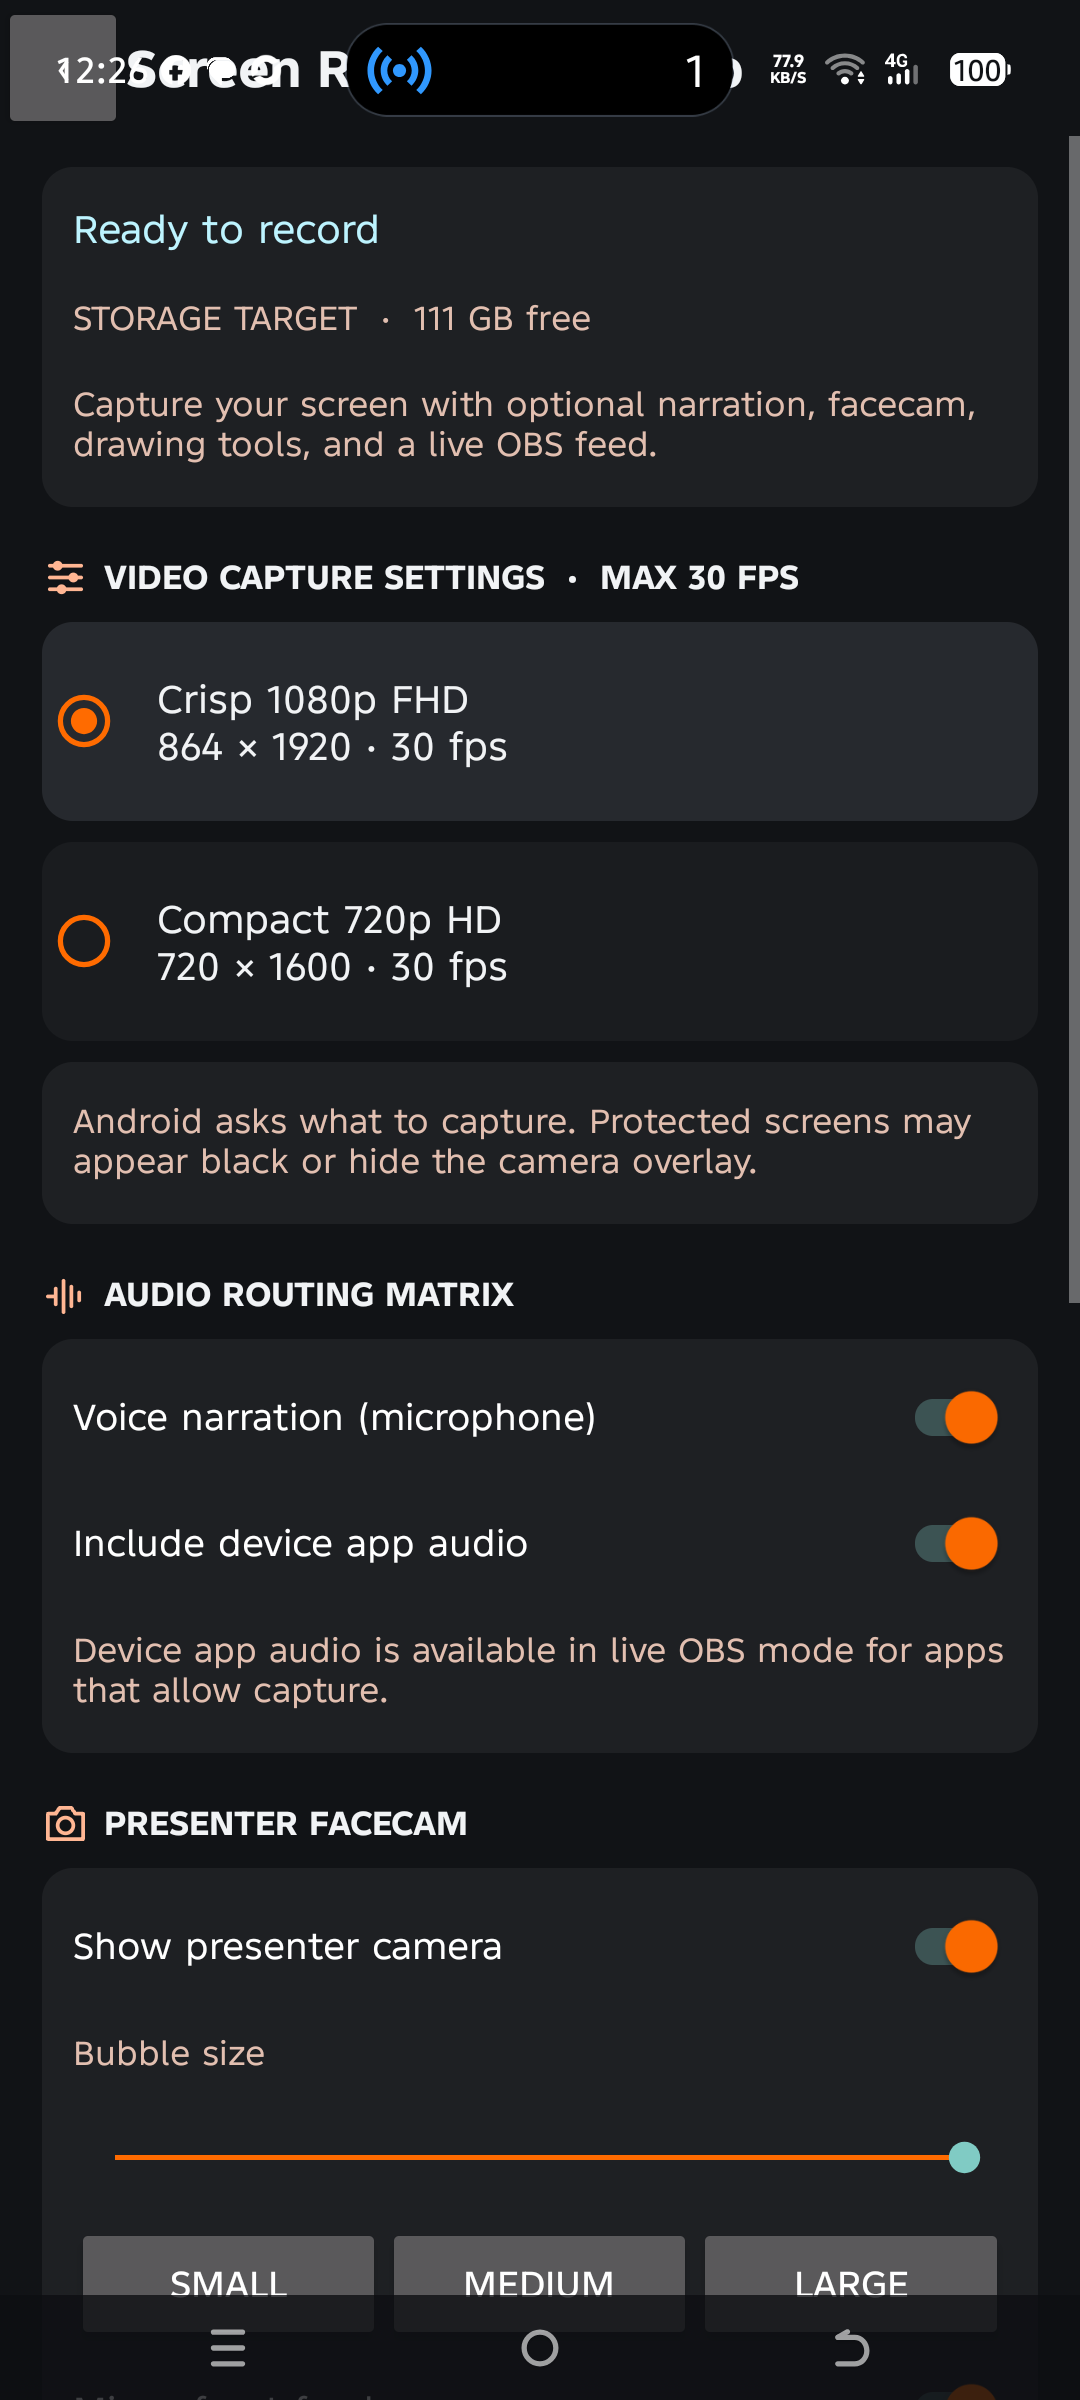
Choose Compact or Crisp for the recording quality. Set microphone narration, presenter camera and annotations as needed. App audio applies to live OBS mode for apps that permit capture. Scroll to Start screen recording and approve Android capture. Stop and save, then choose Review take to play, scrub, edit or share the MP4.

  1. Recording quality
  2. Microphone narration
  3. Presenter camera
Open full-size screenshot
Configure Screen Recording Setup123

Publishing

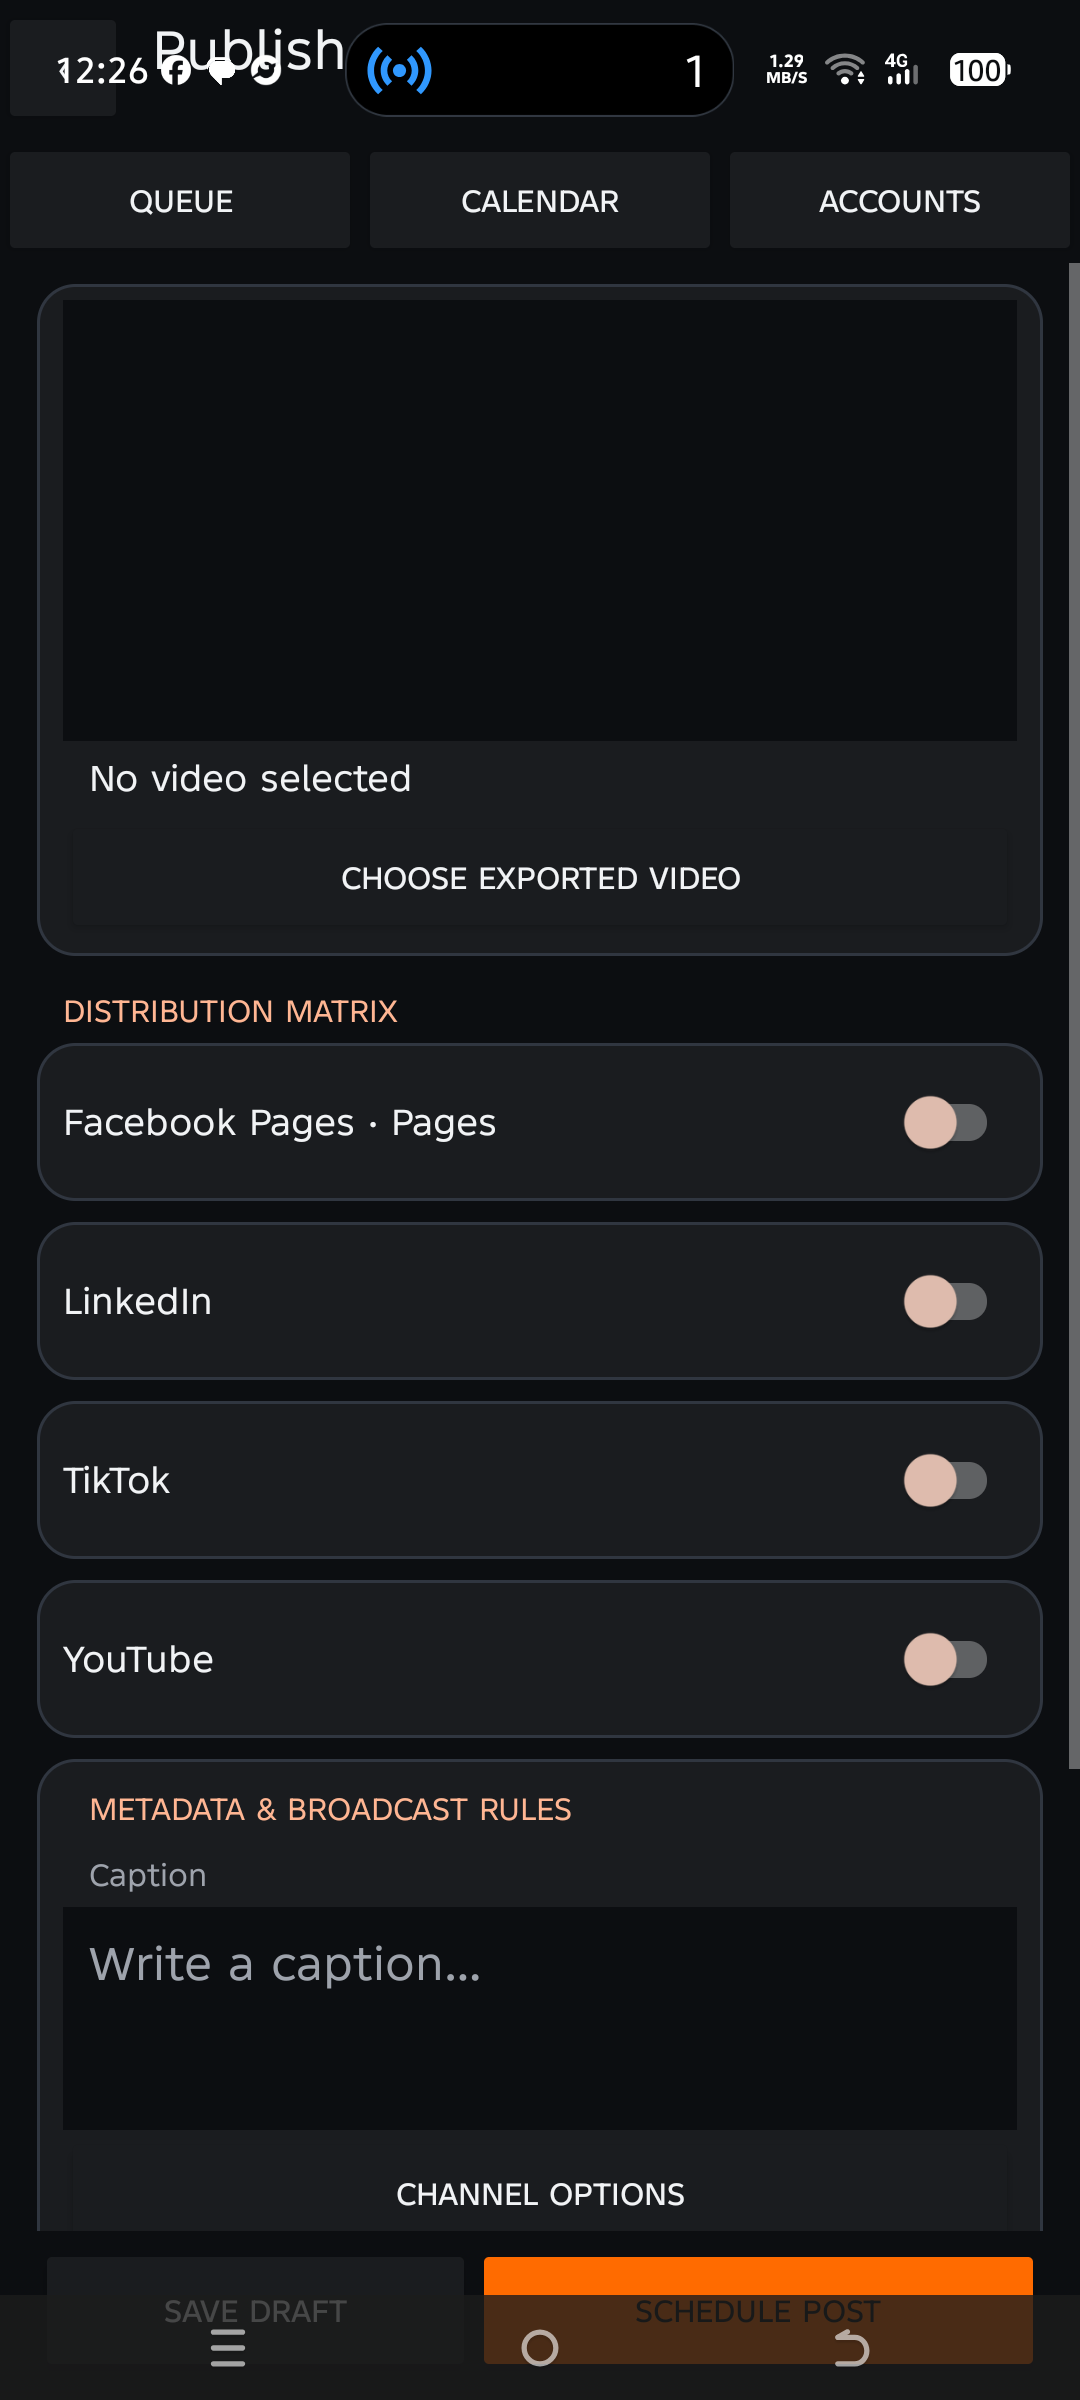
Open the full-screen post composer

Open Publish in Creator Studio. Choose an exported video, select channels, and enter a caption. Use Save draft to keep a local copy. Scheduling requires a connected publishing account. Open Queue, Calendar or Accounts from the top tabs.

  1. Calendar tab
  2. Choose exported video
  3. Channel selection
Open full-size screenshot
Open the full-screen post composer123

Publishing

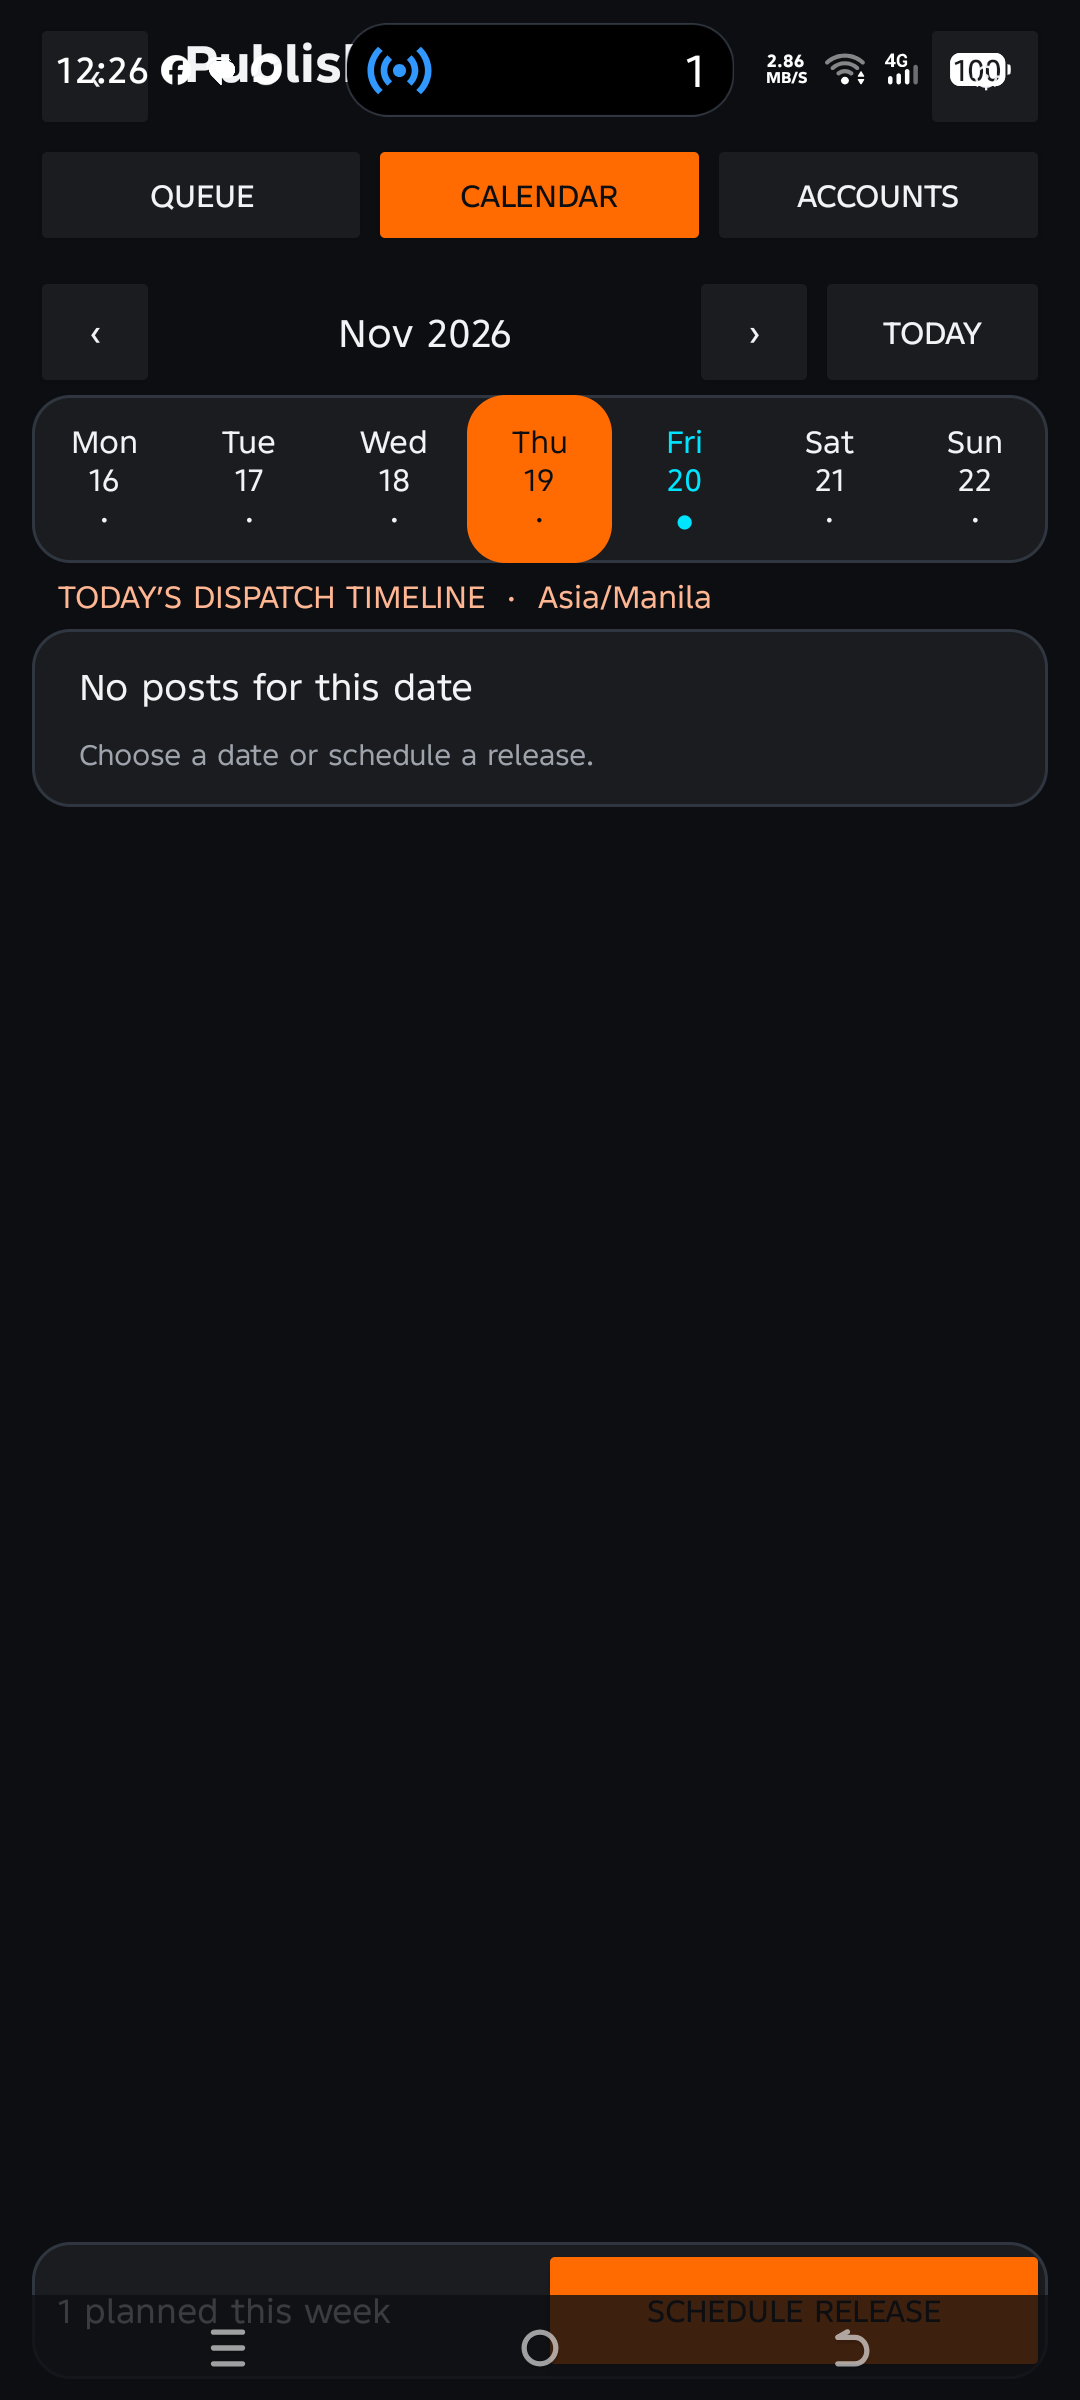
Browse the dispatch calendar

Tap Calendar in Publish Studio. Step between weeks, select a day, or use Today to jump back. Local drafts and confirmed schedules are shown separately. Schedule release opens the composer and uses the selected day in the date picker.

  1. Week controls
  2. Day selection
  3. Schedule release
Open full-size screenshot
Browse the dispatch calendar123

STUDIO & CAMERA

Find the redesigned tools

  • Camera Workspace: use PEAK for focus and ZEBRA for bright areas. Rotate for the landscape viewfinder, Prompt and Scenes.
  • Studio: swipe the project thumbnails, use Import media for the selection grid, and open Edit cover beside the main track.
  • Tap Audio for the mixer. Use the fullscreen button below the preview for scrubbing and five-second skips.
  • Screen Rec: enable drawing or a presenter bubble before capture. For OBS, start capture and scan the receiver QR. After stopping, Review take opens the saved MP4.
Browse the full illustrated tutorials