How to use your Android phone as a webcam on Windows
Pair Solo Camera with Solo Receiver, show the phone feed in OBS, then select OBS Virtual Camera in your video call. Choose your microphone separately in the call app.
Solo Camera is currently available through an approved Android test. Open the test link on your phone and sign in with your approved Google account.
What do I select in my video call?
Choose OBS Virtual Camera as your camera. Select your microphone separately in the call app.
Solo Receiver on Windows after you open it.PART 2Open Broadcast on your phone
- Connect your phone and computer to the same Wi-Fi. If you are using your phone’s hotspot, connect the computer to that hotspot.
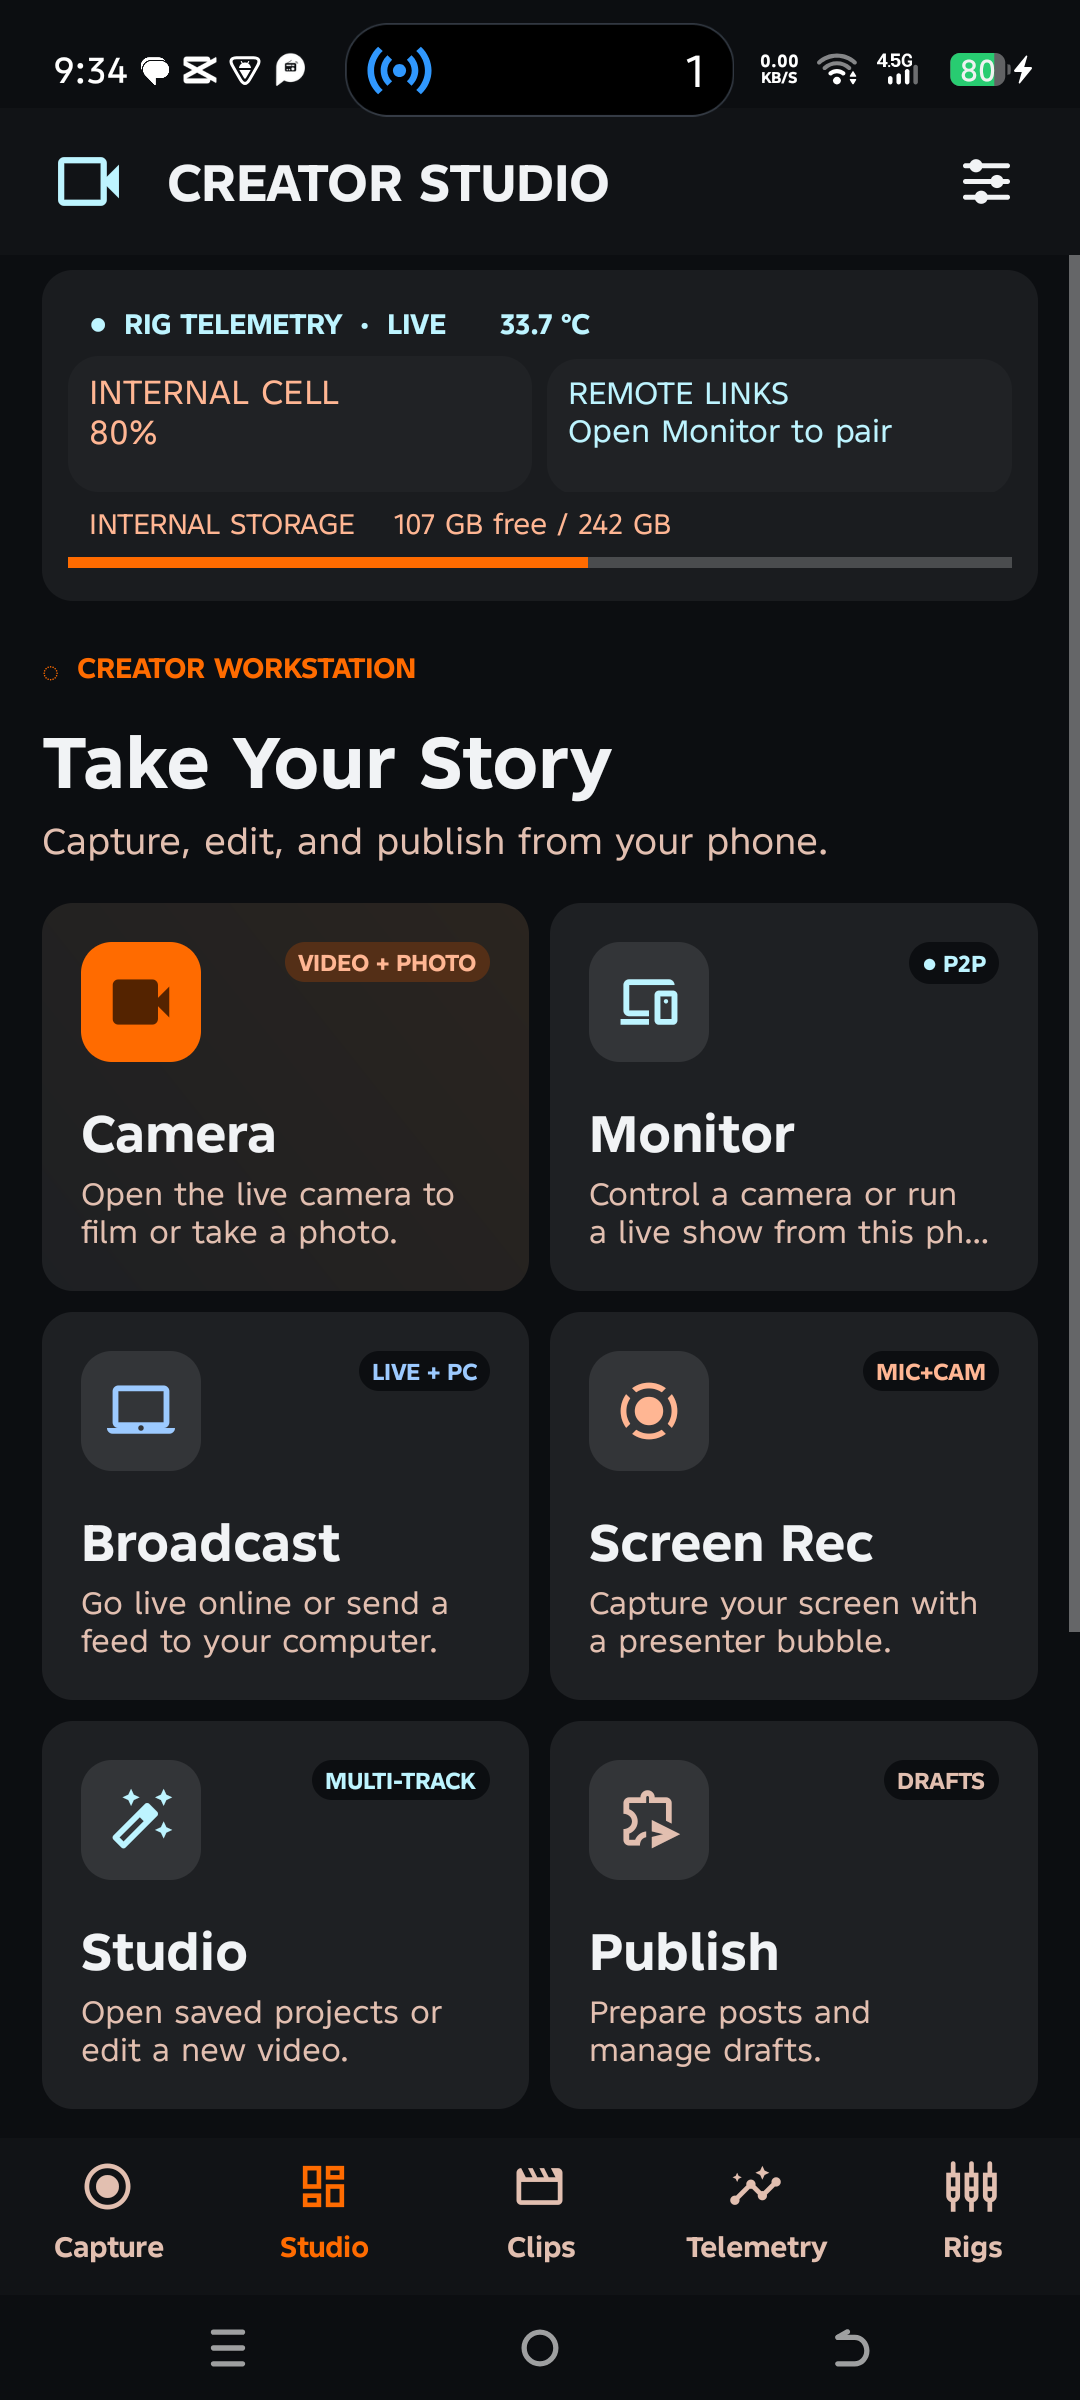
- Open Solo Camera on your phone.
- On the home screen, tap Broadcast.
 1
PART 3Open Webcam to PC
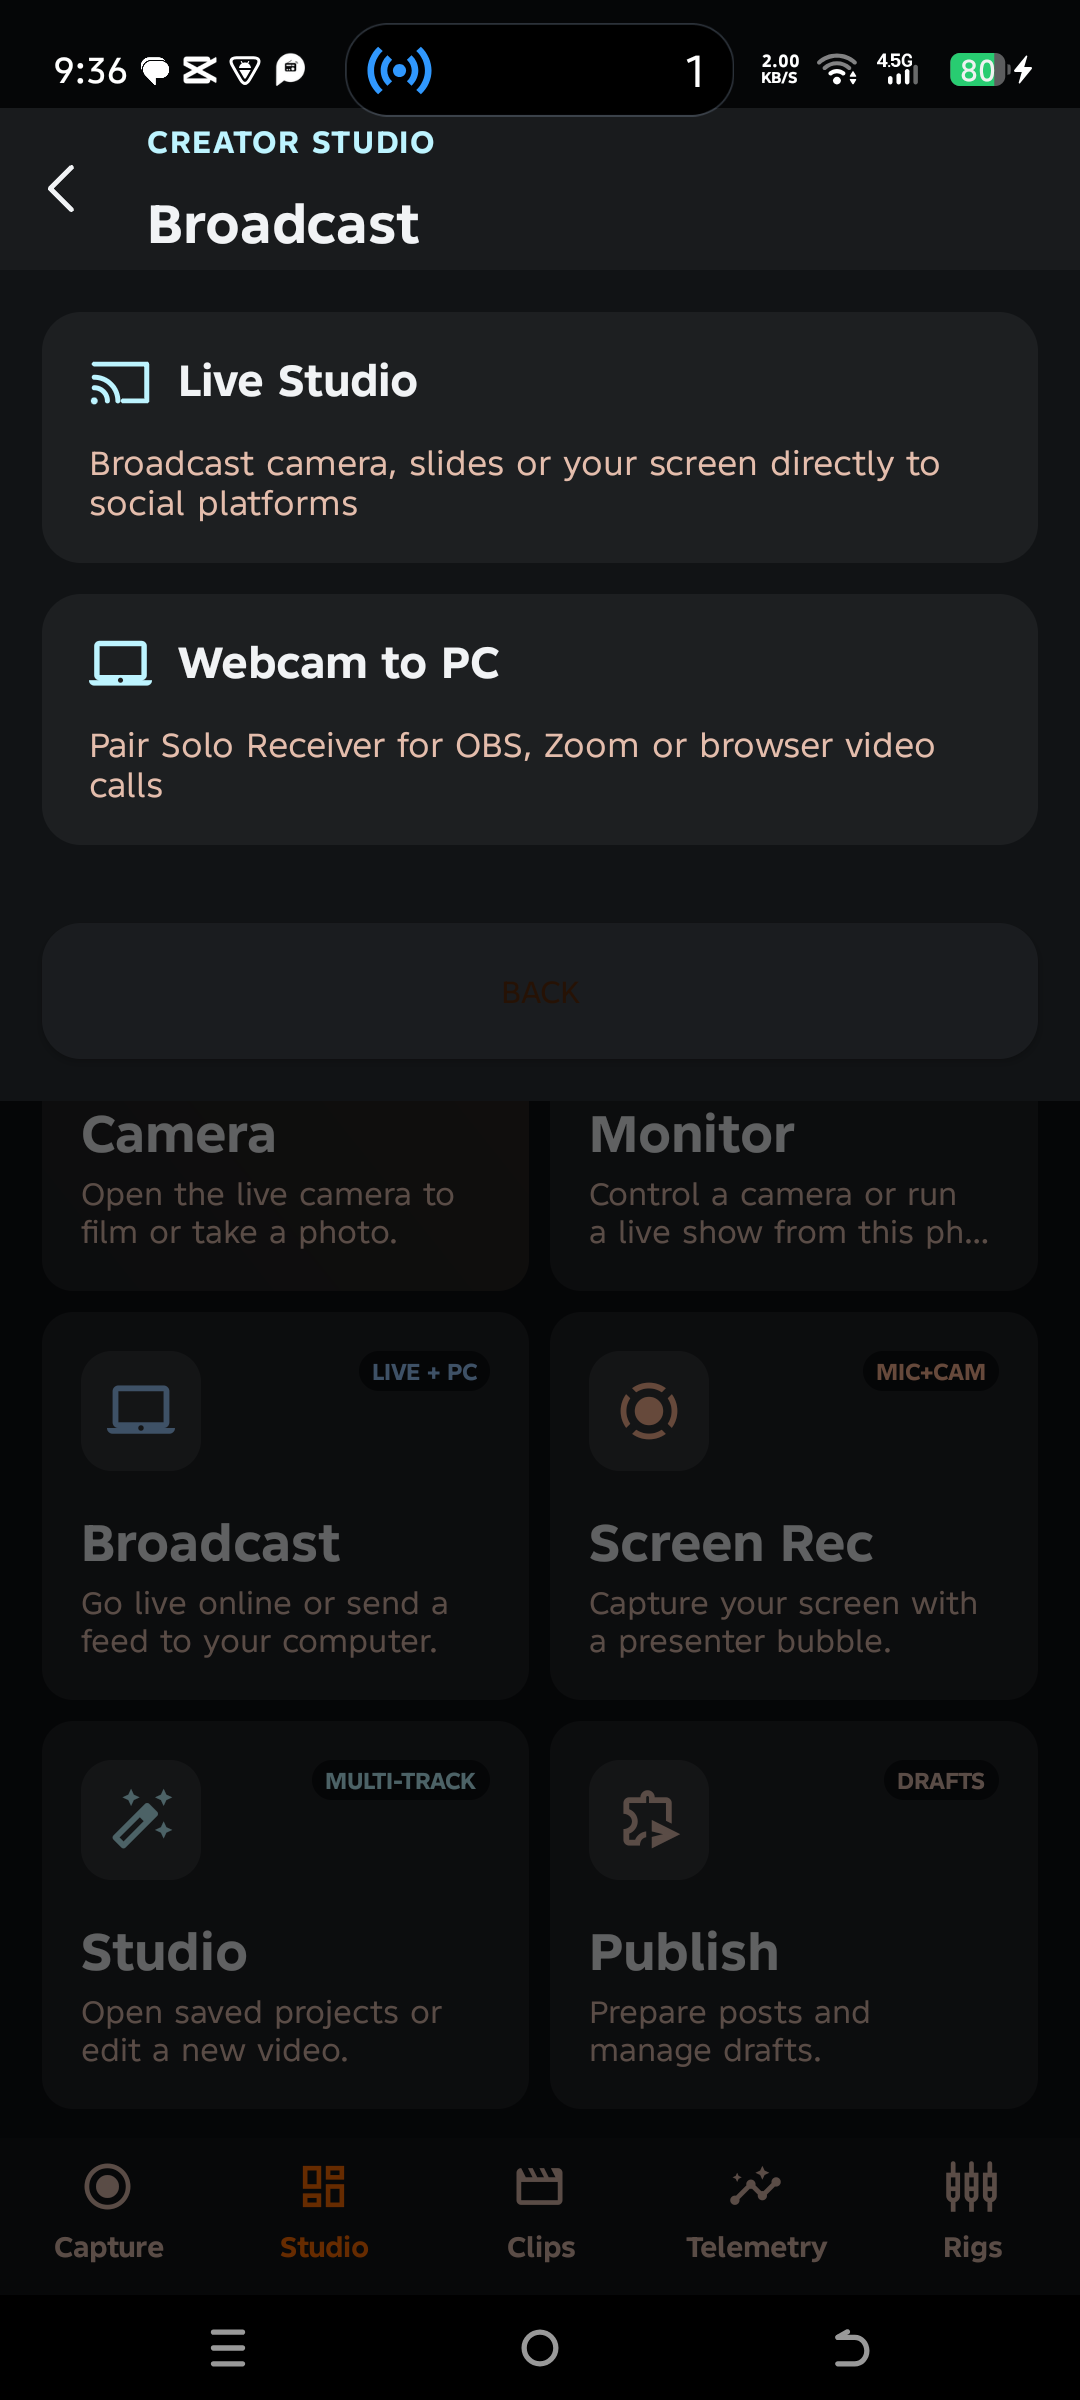
- On the Broadcast screen, tap Webcam to PC.
- Leave this screen open while you get the QR code on your computer.
 2
PART 4Show the QR code on your computer
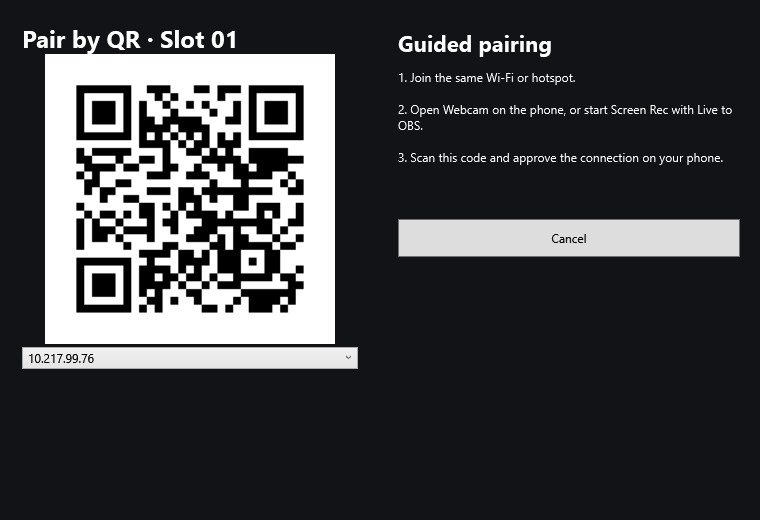
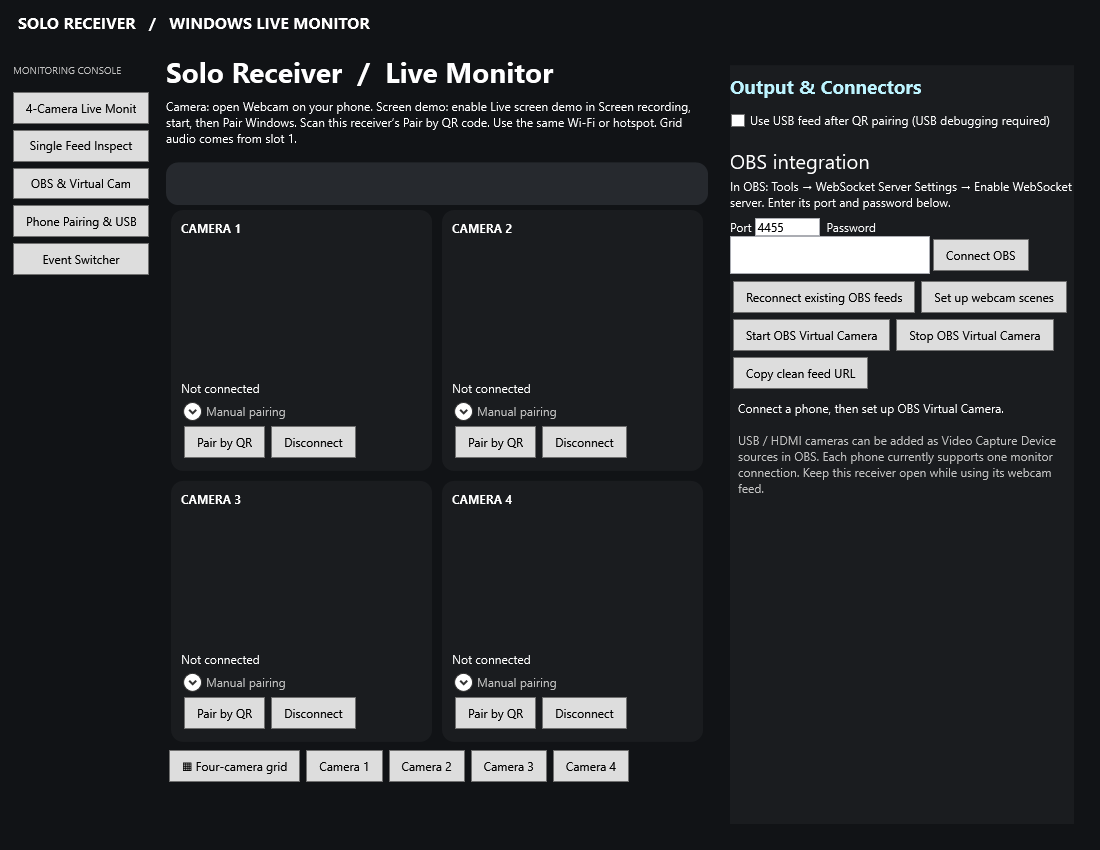
- In Solo Receiver, find an empty slot such as Camera 1.
- Click Pair by QR. Leave the QR code on the computer screen.
 1
PART 5Scan the code with your phone
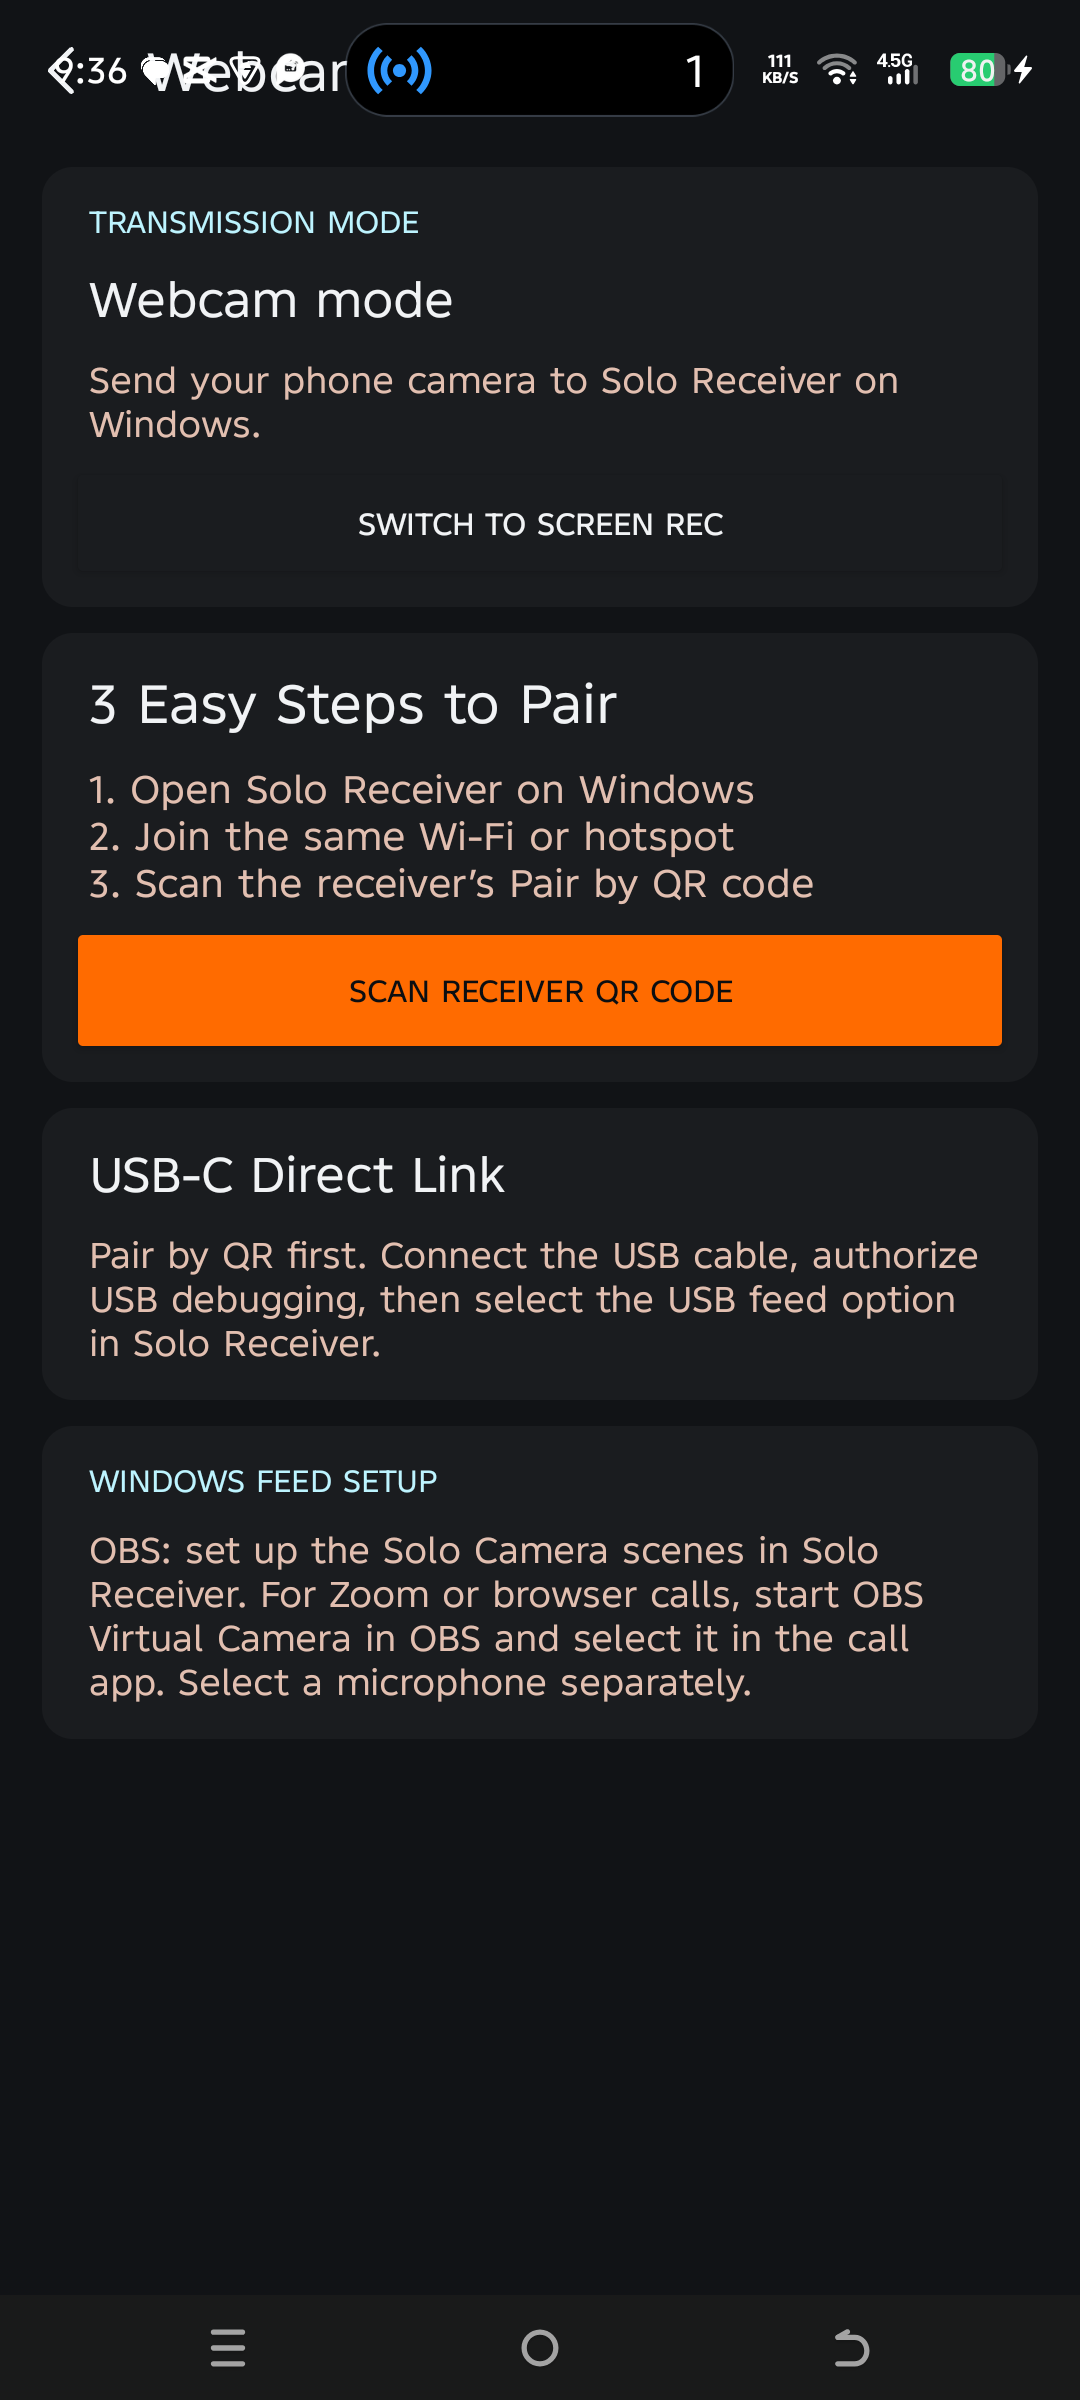
- On the phone, tap Scan receiver QR code. Allow camera access if Android asks.
- Point the phone at the code on your computer. When the phone shows the computer you are connecting to, approve the connection.
- Move your hand in front of the phone. You should see it move in the Solo Receiver window. If you see no picture, check both devices are on the same network, then open a new QR code and scan again.
 3
PART 6Send the picture to OBS
- In Solo Receiver, click OBS & Virtual Cam, then Copy clean feed URL.
- Open OBS Studio. Under Sources, click +, choose Browser, and click OK.
- Paste the copied link into URL. Set Width and Height to match your OBS canvas, then click OK.
- Once you see the phone picture in OBS, click Start Virtual Camera in the Controls panel. Keep Solo Receiver and OBS open.
See the Start Virtual Camera button in the illustrated OBS guide ↗
 1
PART 7Choose the camera in your video call
- Open Zoom, Teams, or Google Meet and go to its video settings or the screen before you join.
- In the camera list, choose OBS Virtual Camera. Under Microphone, choose the mic you plan to speak into.
- Move in front of the phone and check that the call preview moves. Speak and check the microphone meter before joining. If the picture is blank, check for a moving feed in Solo Receiver first, then check the OBS preview.
See the Start Virtual Camera button in the illustrated OBS guide ↗